What do you get when you combine Pinterest ideas together?
One awesome piece of art for your dining room!
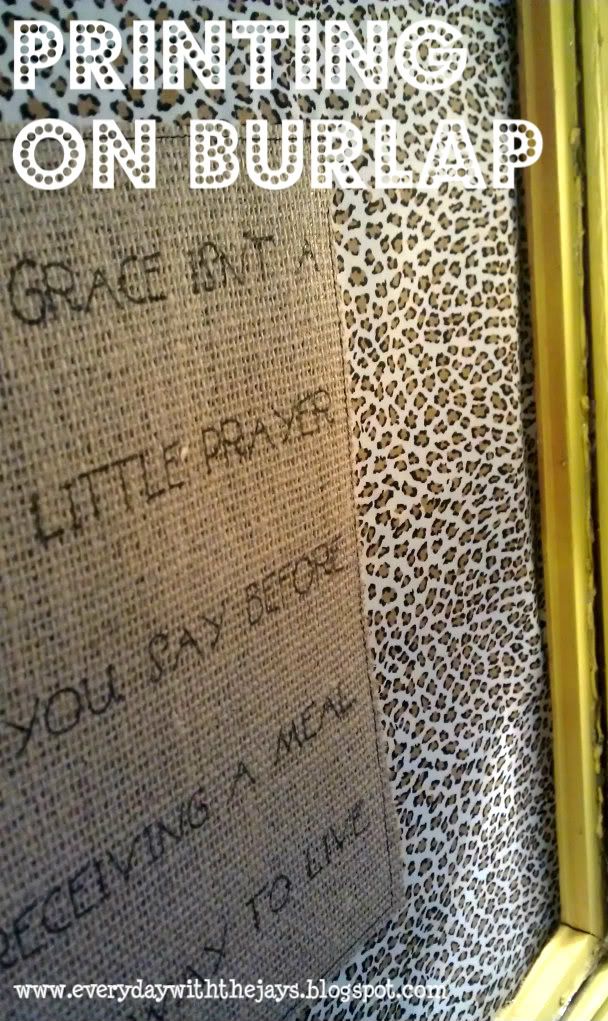
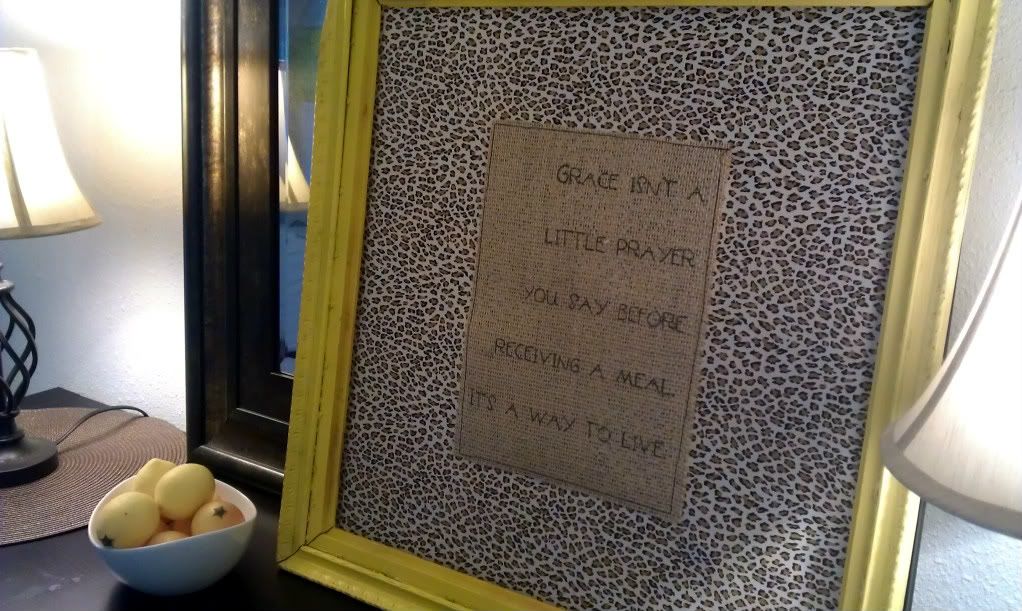
I knew I wanted this phrase somewhere in there [found via Pinterest] and I knew I wanted to try this technique of printing on burlap, shared by Jamie [via Sew Rockin]. I put the two ideas together, added a few bits of my own, and we have a beautiful, beautiful piece of art!
Let's get started, shall we?
 First, print out a copy of what you want printed on your burlap. Obviously it will be an 8.5x11 piece of paper, so cut your burlap to the same size.
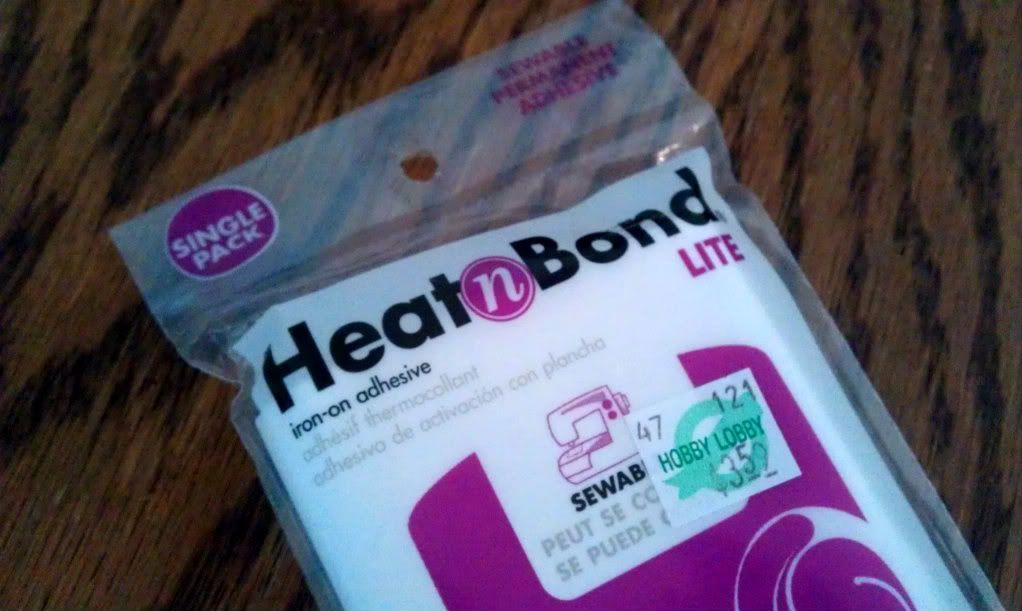 On Jamie's tutorial, she tries four different versions of Heat n Bond and she liked the "Lite" version the best, so that is what I bought! It is located with all the sewing goodies like needles, buttons, elastic, etc at Hobby Lobby.
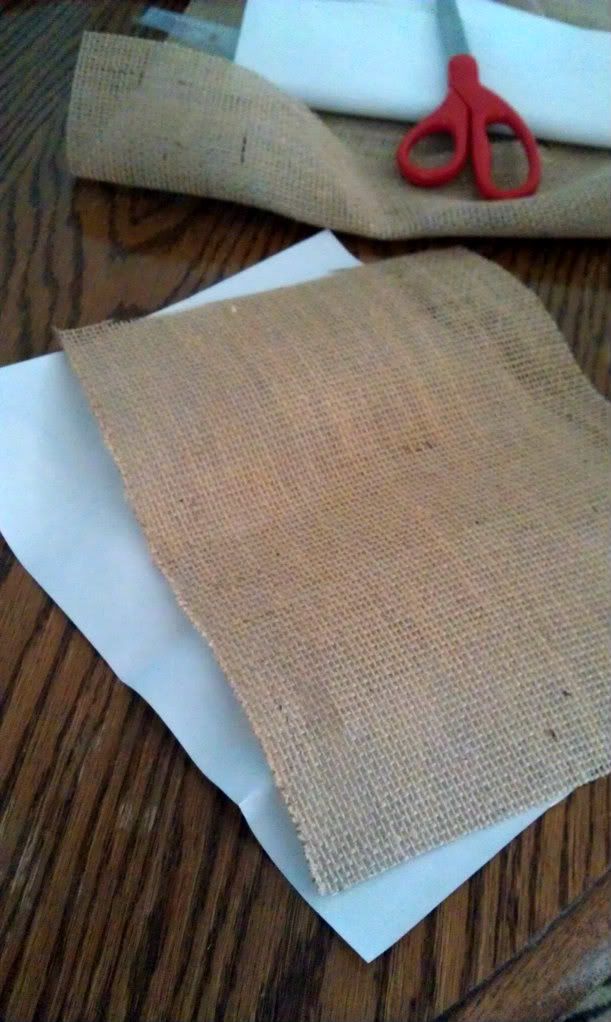
Cut your Heat n Bond paper to the size of your burlap. One side is paper and the other side is clear and textured (that will be the adhesive side that gets ironed on to your burlap).
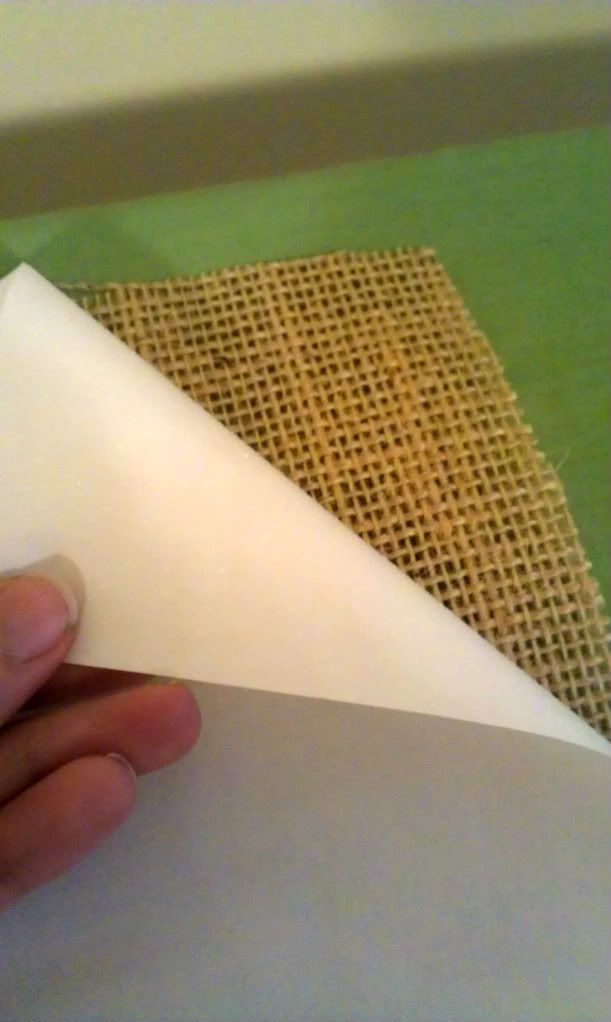
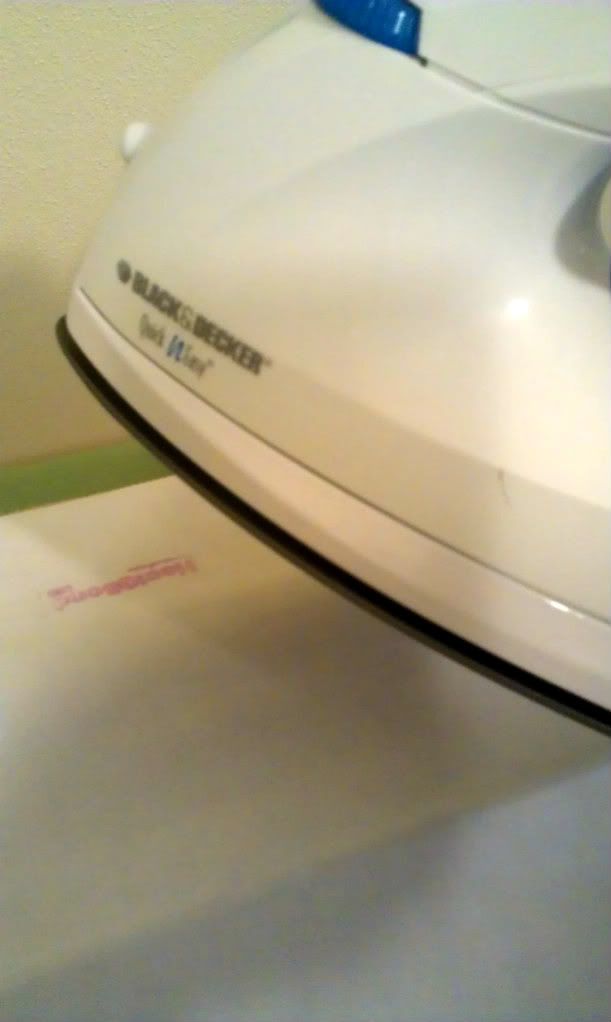
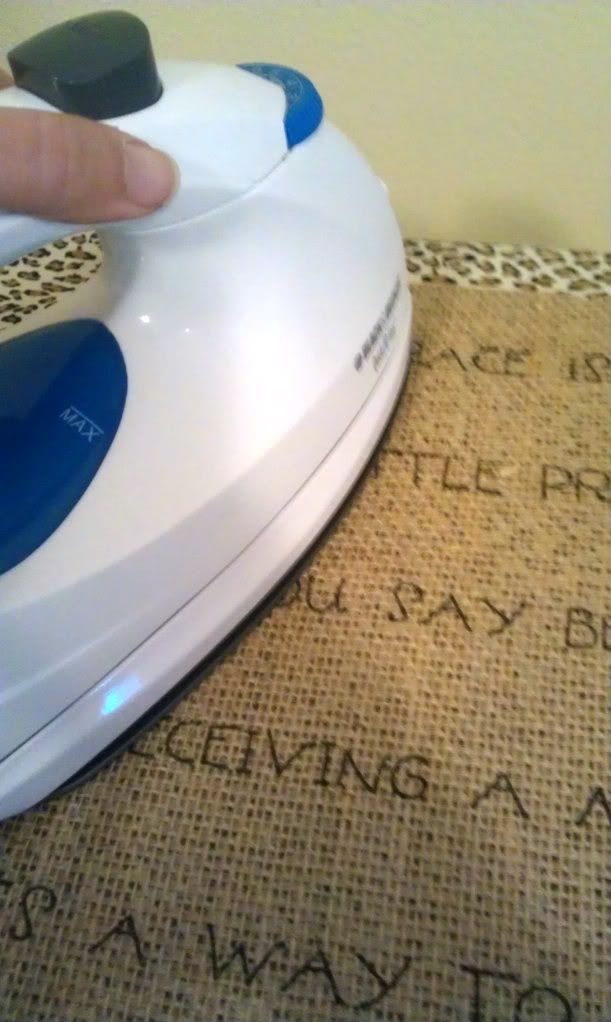
Put your burlap down, lay your Heat n Bond paper on top with the PAPER SIDE ON TOP (the adhesive side should be touching the burlap). Use your iron (on a medium setting I believe, but the Heat n Bond directions will tell you) to adhere your burlap to the paper.
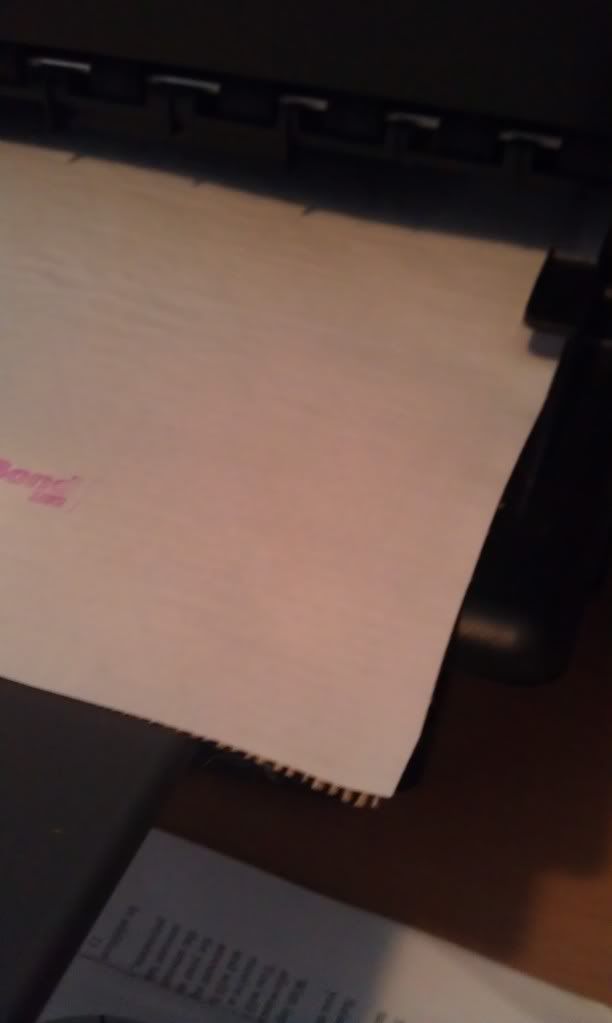
Once that's done and you may have to do some trimming, it's ready to print. Be sure the burlap is inserted in your printer the correct direction so it will print on your burlap. On my printer, the paper has to be inserted facing down and it will come out right side up... does that make sense? During this step, cross your fingers and toes and hope it works (and doesn't get jammed: ask me how I know)!
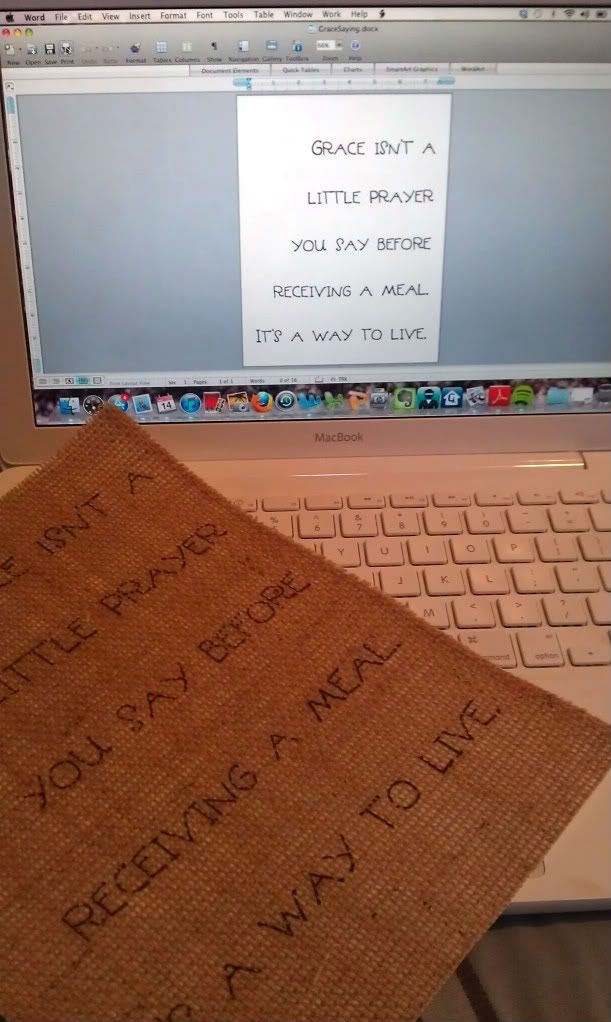
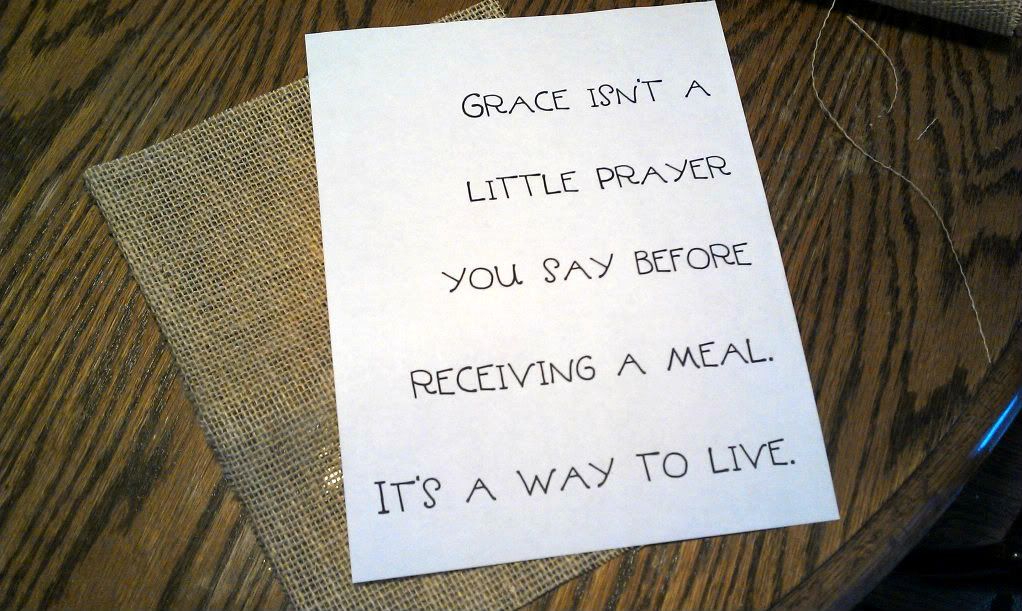
When it DOES print (mine worked the 1st and a half time...), do a happy dance! Compare it to your computer version and smile reallllyyy big. I just so happened to pick a font that looks like I stitched it onto the burlap. Sweetness!

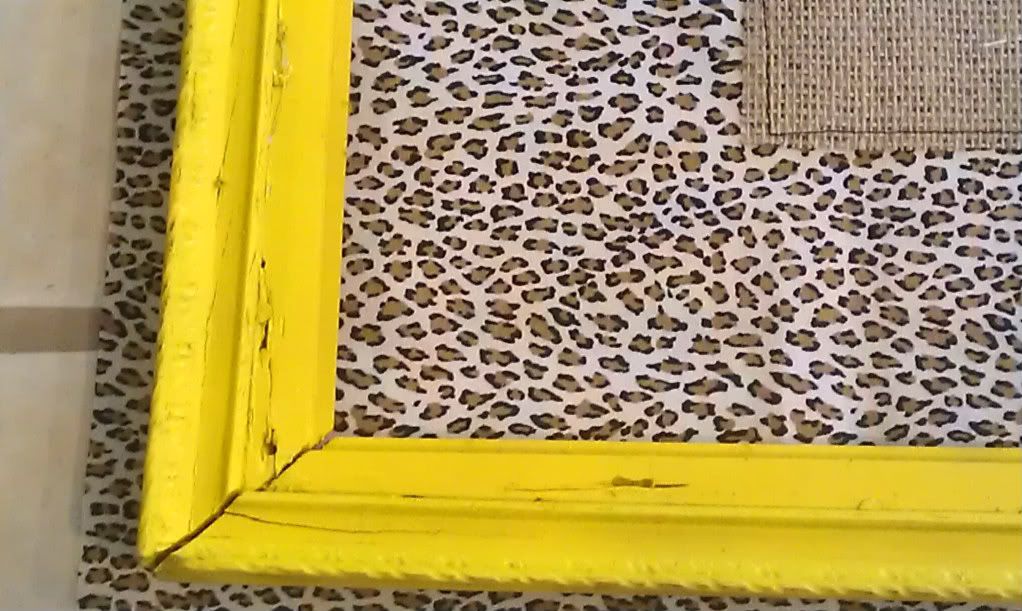
Now, for the other materials. I bought an old frame for $5 at an antique store and spray painted it yellow (remember we are trying to rid our house of brown-ness). I also had some leopard print fabric (I adore animal print: it is all over my classroom, so I need some in my house too), so I cut my fabric to fit my frame, with about an inch or so extra to pull it taut.
When you peel the Heat n Bond off of your burlap, it will now be ready to adhere to your new fabric! Center your burlap onto your fabric and iron it on. It will take some patience, seeing how burlap has itty bitty holes in it and may not adhere as well as a solid piece of fabric.

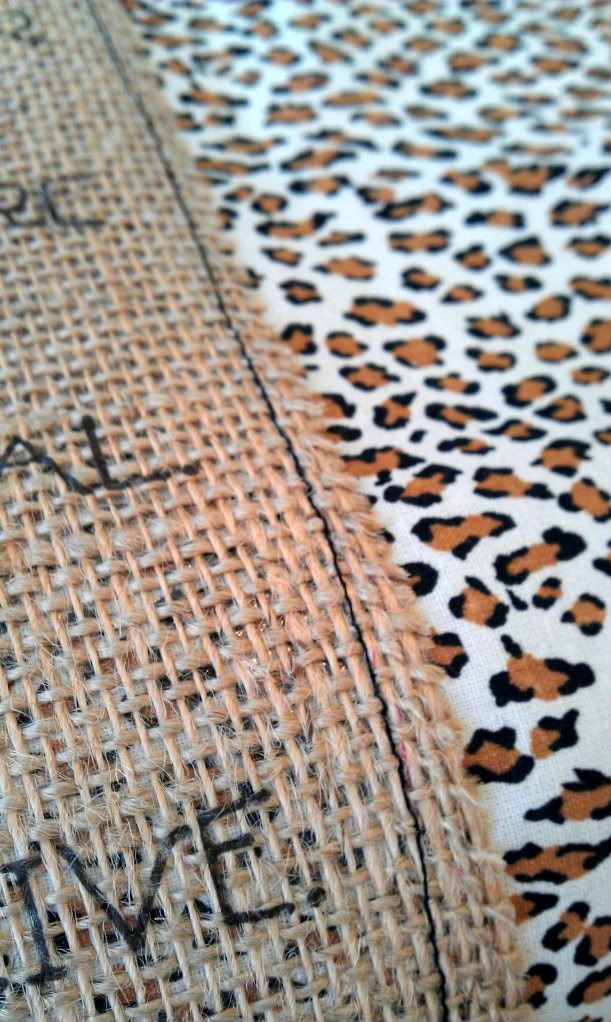
Now you could stop there, but my corners of my burlap weren't ironing on as nicely, so I also added a black simple stitch to the edge to make it sturdy and CUTE.
 Center the fabric/burlap combination in your frame...
Staple that fabric using your new staple gun (wahoo)!
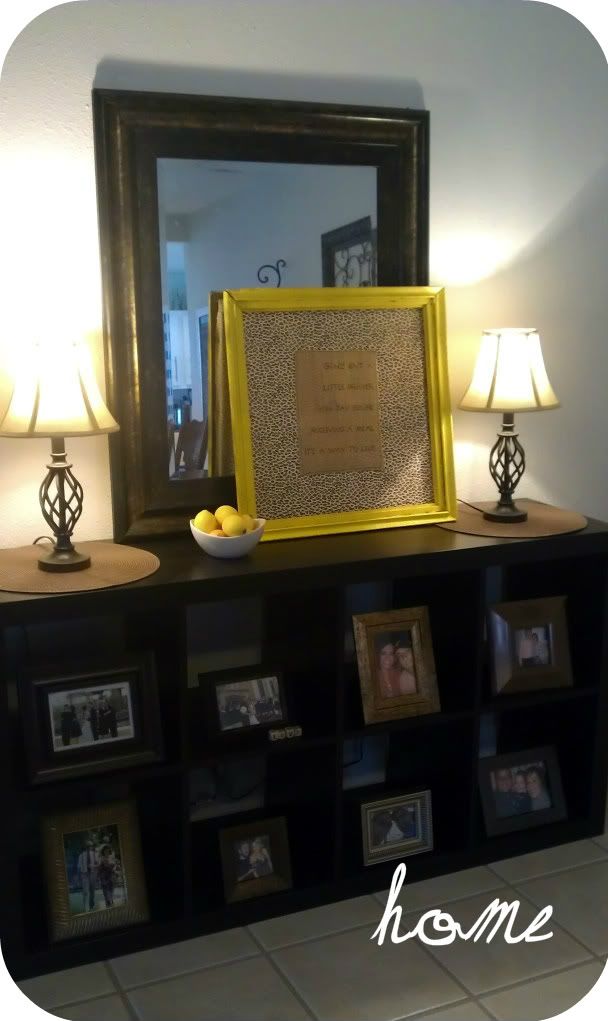
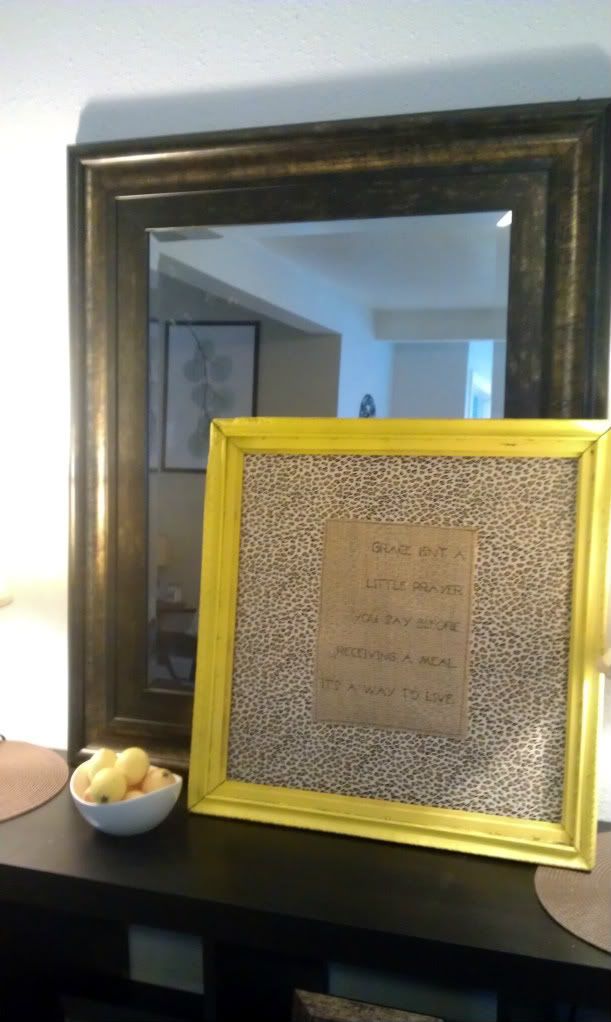
And admire it in your dining room. With a bowl of lemons. Because we're adding color (but now I need more color besides yellow...)
 Cute!
Cute!
Hooray!
Printing on burlap is INGENIOUS. You could make pillows with this same concept too! AGH I'm so excited. The possibilities are endlessssss. Do you like?
Sharing!


I LOVE this!!!! I've painted on burlap to make pillows but this would be SO much easier - and not as messy. I can't wait to try this!!! Thank you!
ReplyDeleteWow, oh wow, Chrissy . . . you are one creative, talented, gal!!
ReplyDeleteloooooooove! you are so talented! i definitely want to do some printing on burlap...you have the wheels in my head turning :)
ReplyDeleteThis is such a great idea! My only concern is the fibers on the burlap will jam the printer heads and cause it then print poorly from then on. Do you have a printer dedicated just for that? Ours is an office printer and I'm a little scared to try. I love your project though.
ReplyDeleteThis is such a great idea! My only concern is the fibers on the burlap will jam the printer heads and cause it then print poorly from then on. Do you have a printer dedicated just for that? Ours is an office printer and I'm a little scared to try. I love your project though.
ReplyDelete