Showing posts with label Crafts. Show all posts

Sunday, August 4, 2013

[make] Book Page Garland

Yesterday, Nate and I went "junkin'" (garage/thrift store/estate sale hunting) with another couple who are friends of ours. We had such a good time rummaging through other people's treasures and making a few our own... we got some GREAT deals that I cannot wait to share with you!

One purchase I made was a hardcover book for $1. It was published in the late '50s and I had no desire to read it, but instead to use its yellowed pages for a craft... I wasn't sure what craft until I perused Pinterest and found Meegan's Book Page Garland... umm yes, I sure did make one too!


Old book. Torn pages. Fan pages into quarters (three folds). Hole punch in the middle and string onto twine. DONE. Super easy, but kind of time consuming. This garland hangs above our mirror in our dining room and it's a little over 100 pages. Not very long, but you can spread them out if you are covering a longer area. The way the pages spin on the twine is fun too!

I start in-service on Friday this week and then next week begins every.day.in-service. I suppose I can say "buh-bye" to summer, but it was a great one! Now to prep for my classroom :) The FUN part!

Have a wonderful week!

"When I am afraid, I put my trust in you." Psalm 56:3


See where I link up: Monday Made it @ 4th Grade Frolics, What I Whipped Up Wednesday @ Sugar and Dots, Craft-O-Manic Monday @ Craft-O-Manic, Monday Funday @ C.R.A.F.T./Lines Across/Uncommon Designs/That's What {Che} Said/Creatively Living, Whatever Goes Wednesday @ Someday Crafts, Show Me What Ya Got Linky Party @ Not JUST A Housewife, {Wow Me Wednesday} @ Ginger Snap Crafts, Link Party @ Destination: Craft, The Inspiration Exchange @ Clean & Scentsible (and others), Before & After Party @ Thrifty Decor Chick, Weekend Wrap-Up Party @ Tatertots and Jello, What I Wore Wednesday @ The Pleated Poppy

Monday, January 14, 2013

[make] Valentine's Candle Jars

I have never really decorated for Valentine's before, but there are just TOO many adorable ideas on Pinterest to not try even just one! I was inspired by this Valentine jar from The Pleated Poppy: she decorated with a doily and twine, but I took it a bit further with patterned paper, burlap, and lace.

After this adorable project, I am now loving the decorating for all holidays... Yes, I am now one of those people! But before you get nervous, no I'm not going to go all out like I do at Christmas, Halloween, during the Fall... Just a few touches of pink-y love here and there for Valentine's Day. See what I mean?

As I shared last week, I just recently made a runner for our kitchen island. I used some Mason jars I had lying around and put tea lights in them to add some "flair" to our island. They are so cute: however, they have been the first ones hit up for Valentine's decor! See what I did below.

Scrapbook paper folded in half: I drew half of a heart, then cut on the line to make the perfect heart (I could've used my Silhouette to cut out the hearts, but this was just as easy, if not easier).

My plain Mason jars were then hit up with burlap... just use a hot glue gun to secure the burlap snugly around the glass. 


I used pink and white lace scraps my Grandma gave to me last year. No rhyme or reason, just mix and match colors with sizes and hot glue to the paper. I then used sheer pink and brown ribbon to secure the heart/lace to the burlap (no gluing the heart to the burlap: that now leaves me lots of options for other holidays)! I love how the sheer ribbon isn't noticeable and therefore your attention is on the heart.

Pretty, pretty.

What do you think? I love their subtle glow once they are lit, and the hearts/burlap/lace combination is lovely! Perfect for a season of love. So, now it's your turn. Do you decorate for Valentine's? Share please!

Happy Monday! T-minus three days until my wisdom teeth extraction... Yikes!

"And these three remain: faith, hope, and love. But the greatest of these is love." 1 Corinthians 13:13

See where I link up: Monday Made it @ 4th Grade Frolics, Blog Hop @ Naptime Review, Tips & Tricks @ Stringtown Home, What I Whipped Up Wednesday @ Sugar and Dots, Craft-O-Manic Monday @ Craft-O-Manic, Link Party @ Uncommon, Whatever Goes Wednesday @ Someday Crafts, Show Me What Ya Got Linky Party @ Not JUST A Housewife, {Wow Me Wednesday} @ Ginger Snap Crafts, Link Party @ Destination: Craft, The Creative Spark @ Clean & Scentsible, Before & After Party @ Thrifty Decor Chick, Weekend Wrap-Up Party @ Tatertots and Jello, What I Wore Wednesday @ The Pleated Poppy


Monday, October 22, 2012

[make] Scrapbook Letter Art


Happy Monday, everyone! This weekend, I finally was able to fit some crafting/sewing/new recipe-ing (?) into my schedule! That is my idea of a happy weekend.

Here is my crafty contribution from my weekend. Nate and I had these shadow boxes in our bedroom... nothing exciting at ALL. They actually started as sea-themed art for our guest bathroom... But I covered those pictures up with scrapbook paper (which silly me didn't even pay attention to the direction of the scrapbook paper... I am fully aware that the two papers are different directions, I'm just trying to not let my OCD self notice it)...

Before... and after, neither are too exciting.

The long shot of the back wall in our bedroom... Nothing too exciting (and yes, we have a new bed frame! still need to take updated pictures of that).

So on my journey to Hobby Lobby on Friday, I picked up two paper mache craft letters (a "C" for me and an "N" for Nate, of course), scrapbook paper that picked up some colors from our bedspread, along with a few other colors... just for fun :) And also some supplies I had on hand: Mod Podge, an Exacto knife, and foam brush.

Lay your letter right side up on the scrapbook paper...

Hold your letter firmly and cut the perimeter of it with your Exacto knife, carefullyyyy (those things are sharp!)

Pop out your letter...

Beautifully cut letters, perfectly sized for the paper mache letters!

Use Mod Podge on top of the paper mache letters: this will be the glue that adheres your scrapbook paper to your paper mache letter.

Apply the scrapbook paper letter, and then flip the entire thing over and trim any scrapbook paper peeking over the edge.

Apply Mod Podge to the front... this will add a glossy coating to your letter.

I used the little wooden stick that comes in bags of stuffing (that's supposed to shove the stuffing into the corners of pillows and whatnot) to smooth my scrapbook paper (with Mod Podge) and eliminate any bubbling.

I then used my Exacto knife to roughen up edges and take away any additional scrapbook paper tears, etc. You can also use sand paper but my Exacto knife was closer :)

Ta da! I used hot glue (of course) to add these to my shadow boxes in our bedroom. Just a colorful touch in an already-patterned shadow box. I asked Nate if it was too girly for him, but he said it was fine. Gotta love a husband who doesn't mind crafty projects!

Adds a fun pop of color; just a little something, doesn't it? It doesn't steal all the focus in the bedroom, but you do see that it is there. Much better than the before, don't you think?

Again, here's the before...


And after!


Who else crafts with paper mache letters from Hob Lob? There were also extra large wooden letters that I had my eye on... Anything with a C, N, or J is a-okay in my book! Love personalized touches and monograms!

I hope you all had a lovely Monday!

"He also says, 'In the beginning, O Lord, you laid the foundations of the earth, and the heavens are the work of your hands. They will perish, but you remain; they will all wear out like a garment. You will roll them up like a robe; like a garment they will be changed. But you remain the same, and your years will never end.'" Hebrews 1: 10-12

See where I link up: Monday Made it @ 4th Grade Frolics, Blog Hop @ Naptime Review, Tips & Tricks @ Stringtown Home, What I Whipped Up Wednesday @ Sugar and Dots, Craft-O-Manic Monday @ Craft-O-Manic, Link Party @ Uncommon, Whatever Goes Wednesday @ Someday Crafts, Show Me What Ya Got Linky Party @ Not JUST A Housewife, {Wow Me Wednesday} @ Ginger Snap Crafts, Link Party @ Destination: Craft, The Creative Spark @ Clean & Scentsible, Before & After Party @ Thrifty Decor Chick, Weekend Wrap-Up Party @ Tatertots and Jello, What I Wore Wednesday @ The Pleated Poppy 

Monday, September 17, 2012

[make] Girly Girl Headbands

Upon hearing the news of my new niece's arrival, I turned to Pinterest (of course) for the perfect gift that I could make myself. I am obsessed with the girly headbands that I am seeing all over the place: adorned with poofs, flowers, feathers, jewels, buttons... the possibilities are endless! After completing these projects, I most definitely (Lord-willing) want a little girl in my future!

Here are my creations: some I created by following a tutorial, some I made myself just by trial and error, some were actually supposed to be gift wrapping tops (the leopard print and zebra print) but I turned them into bows instead!

Hot glue is now my new best friend. And feathers. And glittery buttons.


What do you think? Who else has a baby girl? I'm lovin' making these headbands!

Have a great (?) Monday!

"My chains are gone, I've been set free. My God, My Savior, has ransomed me. And like a flood, His mercy reigns. Unending love, amazing grace." -Chris Tomlin


Tuesday, September 4, 2012

[make] Fall Paper Cone Wreath

September, the beginning of the fall months! My favorite time of year. Well, besides Christmas :) Anyways, new month means new adornments for my burlap foam wreath form!


First, a recap of previous month's wreaths: remember, I use the same burlap-covered foam wreath and add various adornments (except May/June's fabric scrap wreath). So easy and cheaper that way! Click on the picture to head to its specific post.

Alrighty! This month's wreath came from an inspiration post I saw at Sassy Style. She made paper cones and attached them to a wreath form. She used two different sizes of paper for hers and filled the outside and inside with cones. Here is my altered version!

First, I cleared off my burlap wreath (and I left the tulle hanger from last month).

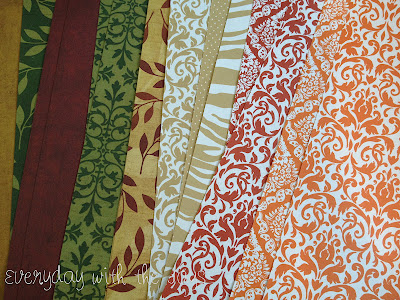
I picked out fall themed scrapbook paper, which if you follow me on Instagram (chrissydj), you would have already seen this!

Next, I made paper cones out of each scrap of paper. The lengths are 12x6 for each sheet. 

I used my favorite craft tool ever, straight pins, to attach each cone to the foam wreath form.

Here's an easy way to make a cone. Make your two bottom corners touch, almost like a triangle and roll it up!

Here's what it looked like when it was all done. Being the teacher that I am, I had to make a stack of papers in a pattern rotation. Yep, that's OCD me. Now, I had every intention of leaving it like this...

Until I flipped it over!!! Look how gorgeous it is! Almost looks like a turkey's tail feathers... which is fitting for the fall season.

Close up shot of each cone...

I hung it up on a door hinge in my craft room to take a look at it, and I just thought it needed something...
  

Luckily, I had a "J" laying around from a Christmas project last year that I never completed. I used an Exacto knife to cut out the paper to fit the "J" exactly.

Ta-da! I used Mod Podge to adhere the paper to the wooden letter. 


(And I trimmed off excess with the Exacto knife by flipping the "J" over)

So pretty! I like how you can see the white on all of the cones to give some continuity to the pattern. Connects it all together while still being different and fall-y!

I think this may be my new favorite! You can see the folds/edges of the paper cones but it's all good to me.

Close-ups.

Beautiful!

 There you have it. Another wreath for  f-r-e-e  using what I had on hand!

Happy Tuesday (and sorry for the late post: we attended the high school volleyball game tonight)! Good times with the hubs and a friend.

See where I link up: Monday Made it @ 4th Grade Frolics, Blog Hop @ Naptime Review, Tips & Tricks @ Stringtown Home, What I Whipped Up Wednesday @ Sugar and Dots, Craft-O-Manic Monday @ Craft-O-Manic, Link Party @ Uncommon, Whatever Goes Wednesday @ Someday Crafts, Show Me What Ya Got Linky Party @ Not JUST A Housewife, {Wow Me Wednesday} @ Ginger Snap Crafts, Link Party @ Destination: Craft, The Creative Spark @ Clean & Scentsible, Before & After Party @ Thrifty Decor Chick, Weekend Wrap-Up Party @ Tatertots and Jello, What I Wore Wednesday @ The Pleated Poppy 


"Up from the grave He arose, with a mighty triumph 'or His foes. He arose a victor from the dark domain and He lives forever with His saints to reign! He arose! He arose! Hallelujah, Christ arose!"