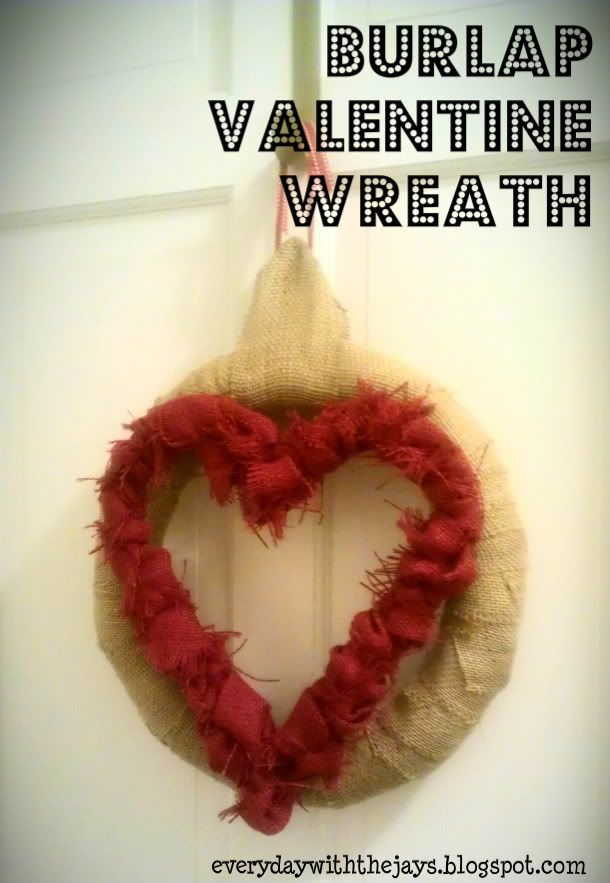
I promised a Valentine wreath tutorial, didn't I? :) Perfect blog post for February 1st!
This wreath is very versatile: the heart comes off, so in the future I can make other holiday-themed adornments (thinking St. Patrick's day, spring time, summer time, 4th of July, etc etc)!
I got the inspiration from
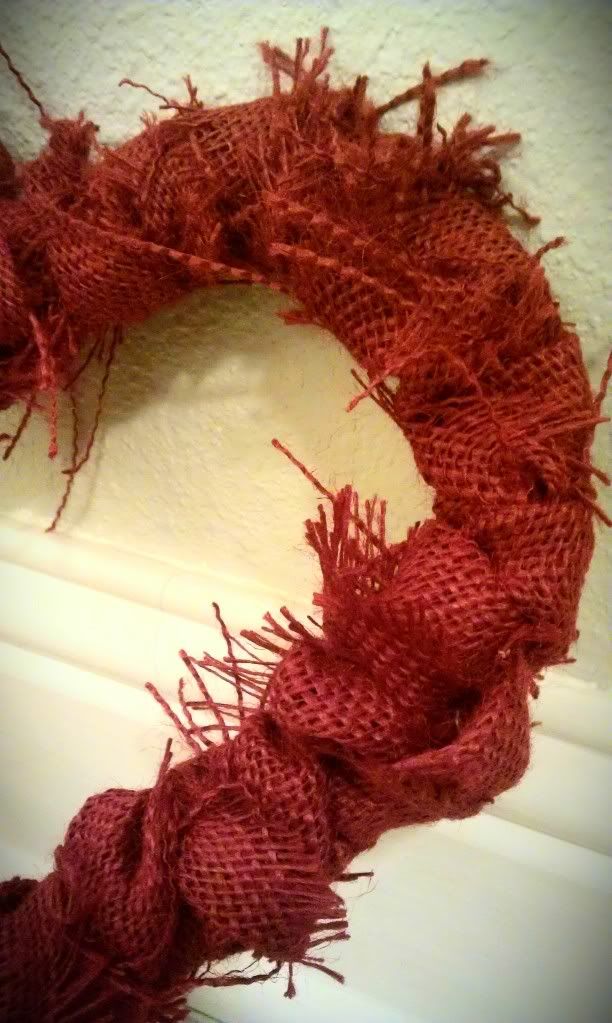
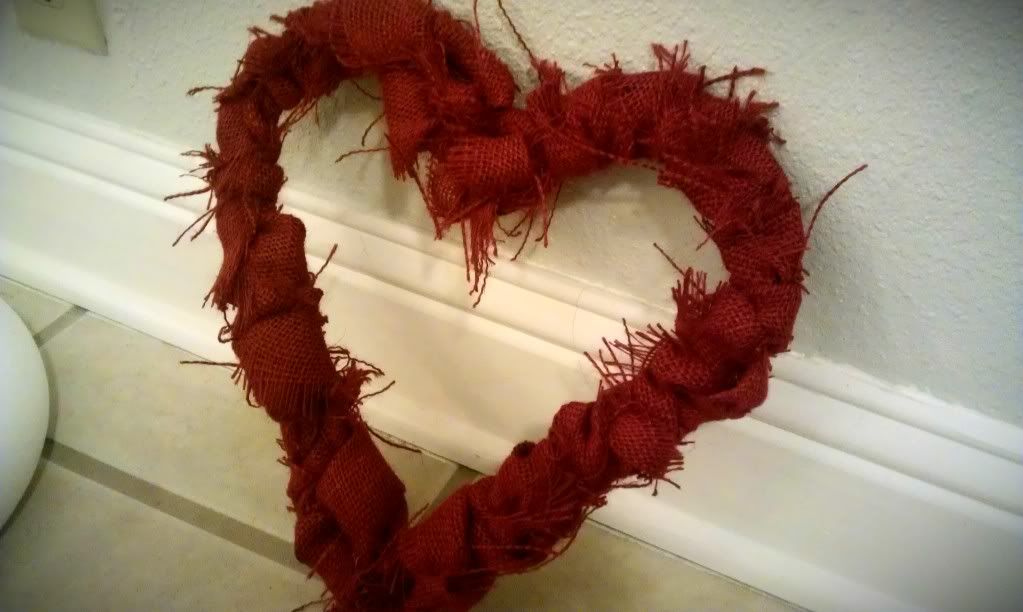
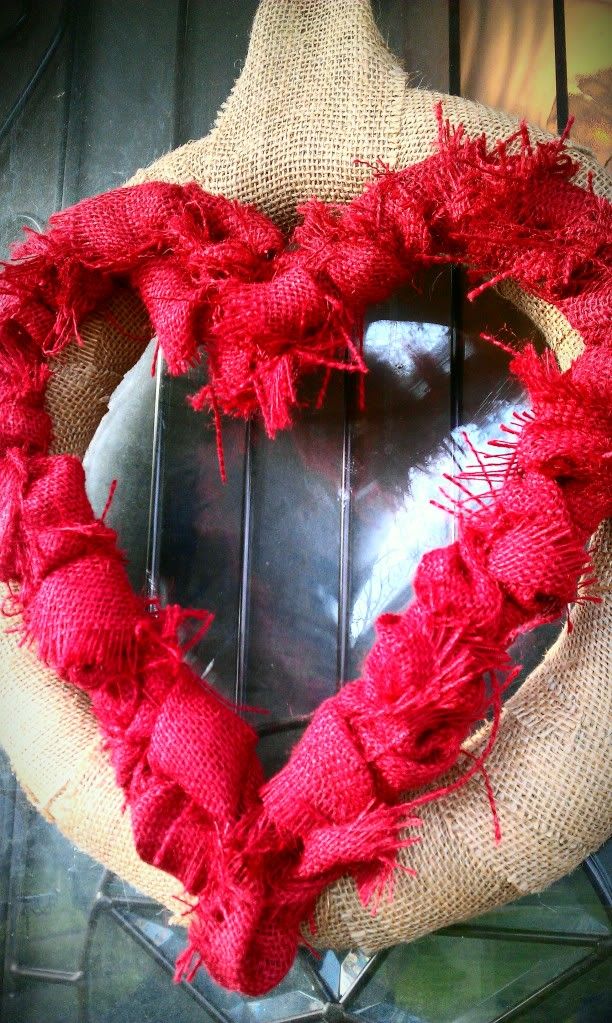
this blog, My Heart's Desire, but I am a bit lazy... instead of doing her super cute bubbles with the red burlap for the heart, I just made the burlap go over/under/over/under and filled in spots as needed. I like how the whispy's (?) from the burlap stick out in random places and makes it look more vintage/shabby chic. And instead of making a bubbly wreath base with the brown burlap, I just purchased a foam wreath form and wrapped burlap strips around and around.
Let's see the process, shall we?
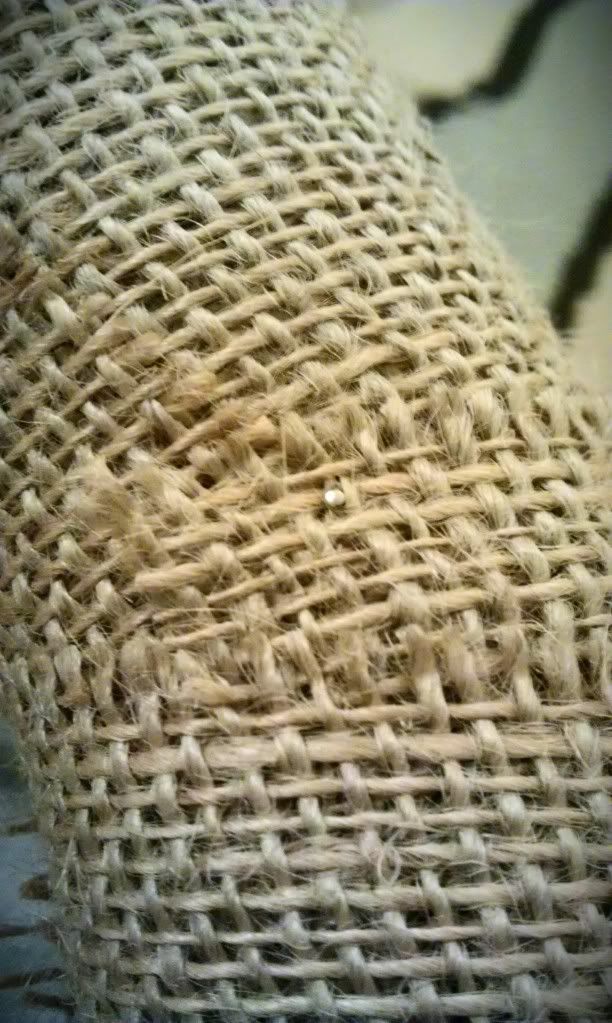
Wrap the foam wreath form in burlap strips...
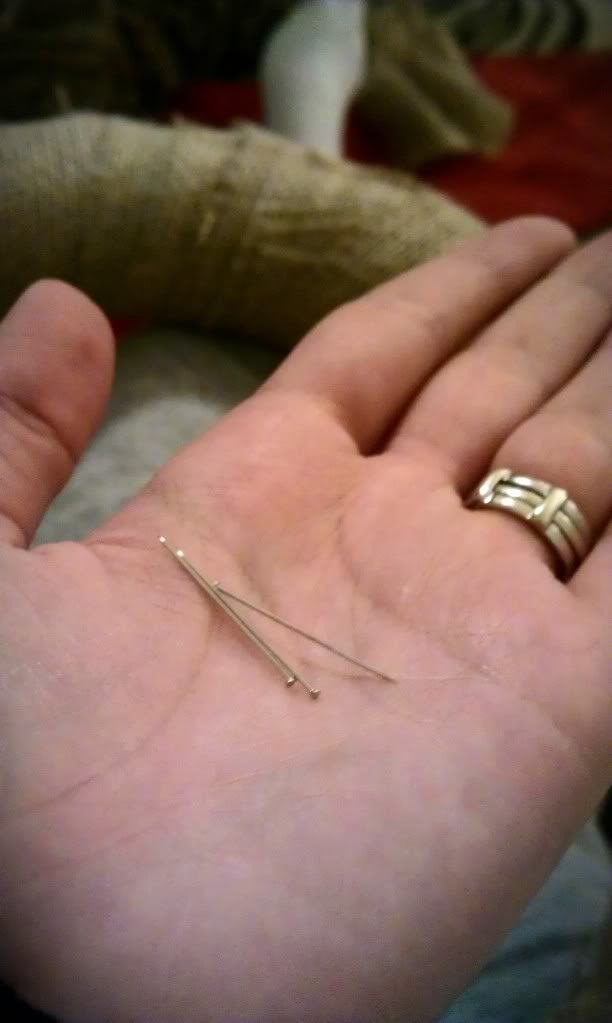
I was going to use hot glue, but these dressmaker pins saved my life! They are so efficient and way better than having strings of hot glue all over your cutie patootie wreath!
Look reaaalllyyy close and you can see the head of one of pins. So small, you can't even notice 'em!
I bought a heart wreath but it is sold in the flower section at Hobby Lobby: not foam, but metal... I should've taken a picture of the before... dang.
You can see the whispy's here: I trimmed some of them, but I like how it's very shabby!
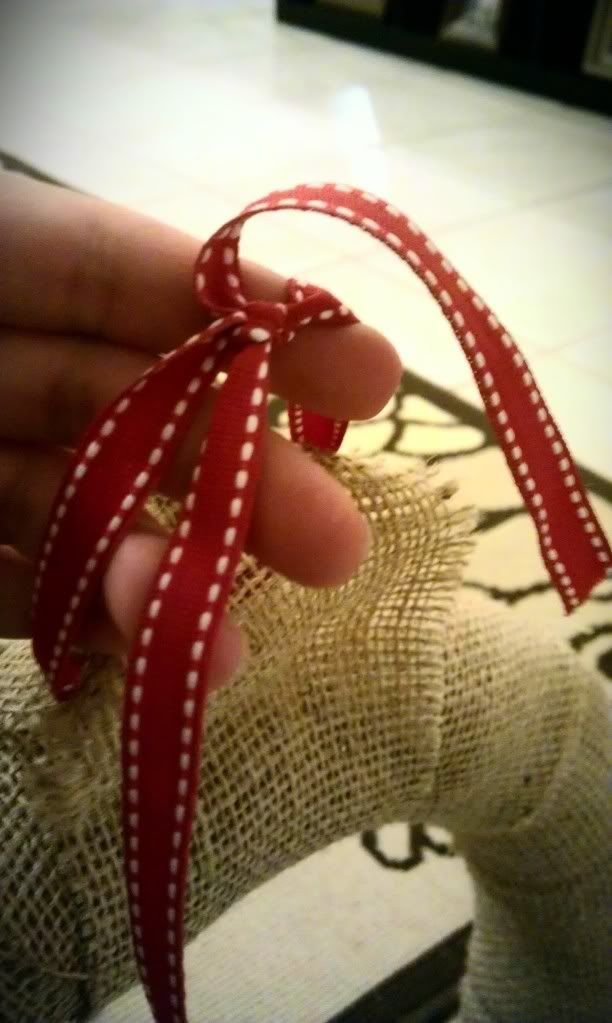
I added a little thang at the top to tie a holiday-appropriate ribbon from to hang on my wreath hanger...
See? Holiday themed ribbon :)
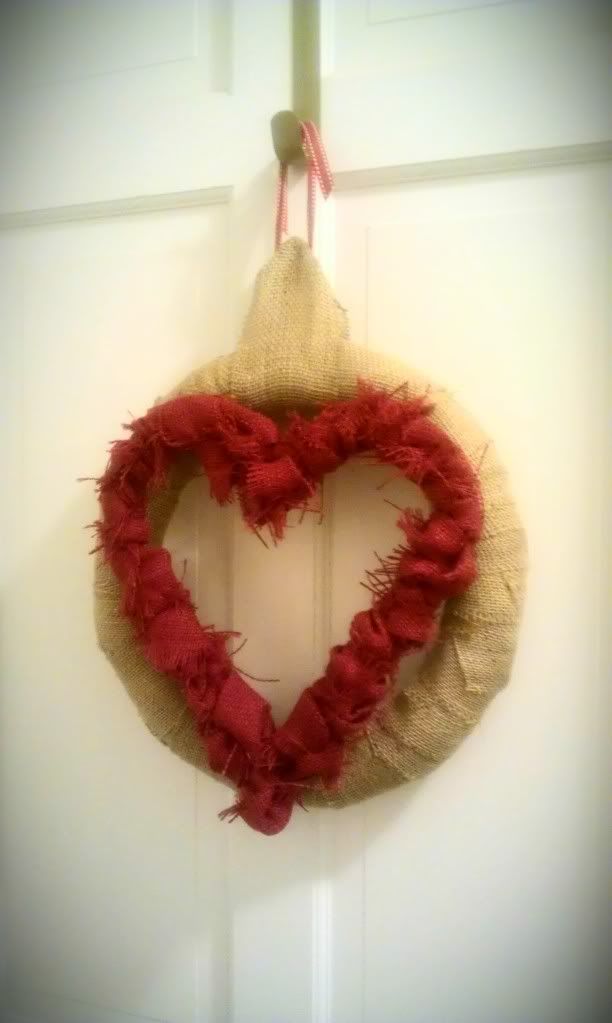
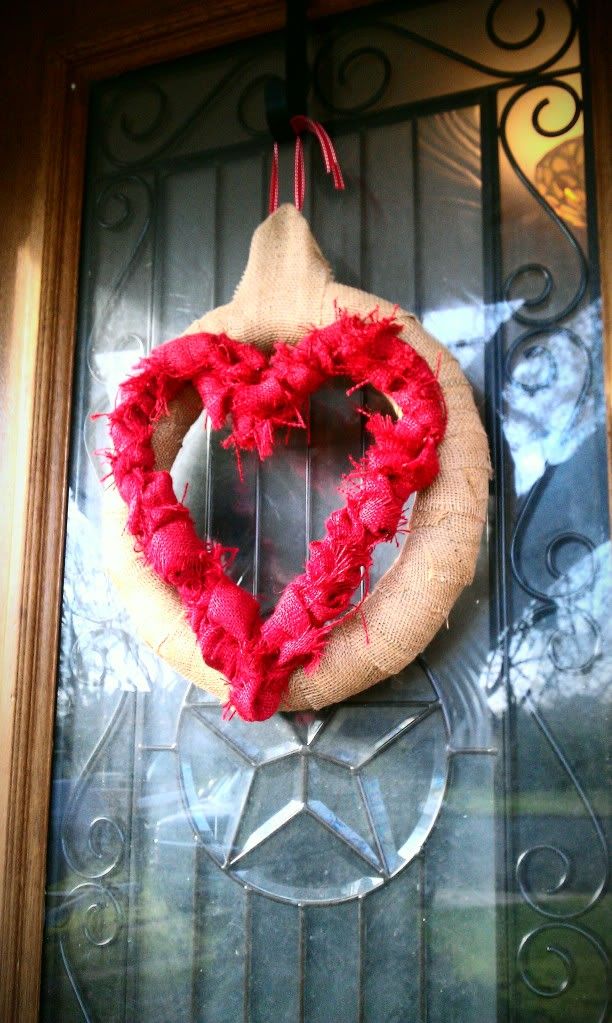
Ta-da! I made this at night so I took a photo of it inside. I attached the heart using more sewing pins and I tested it on my craft room door overnight. Worked like a charm!
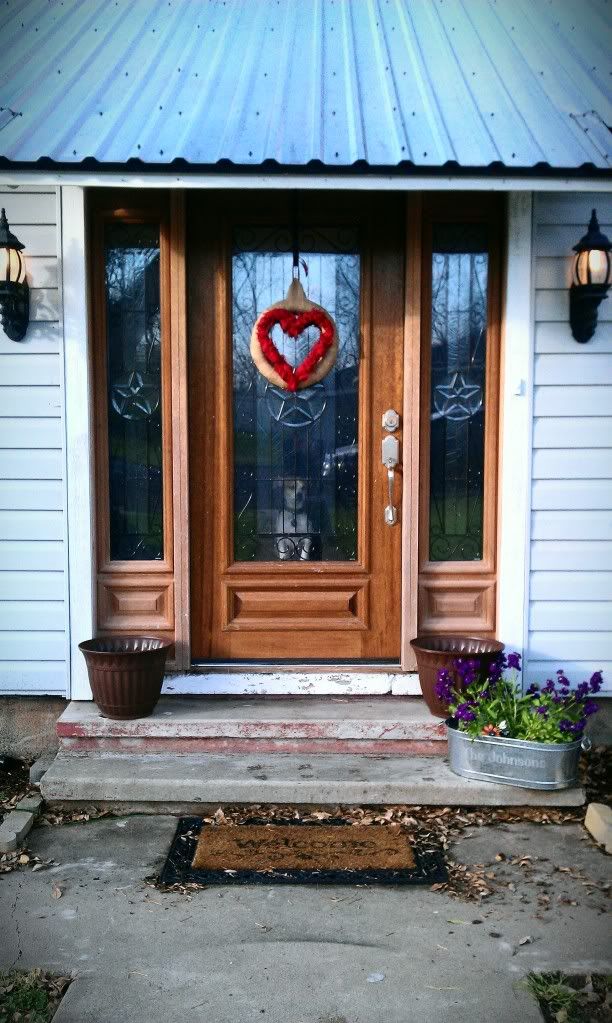
Outside!
I really like it! So proud of how it came out. What other Valentine crafts are you creating?


that looks awesome! I love it!
ReplyDeleteIt's fabulous Chrissy!! So shabby chic!
ReplyDeleteIt looks fab! Have a lovely weekend:)
ReplyDelete~Anne