
My classroom has been a jungle theme and I'm going to continue with that (animal print everywhere, table names are jungle animals) but I'm bringing in more patterns and less animal "themes" (like I used to have monkeys with their names on them for their backpack hooks and on the door, but I'm changing that). My main colors are blues and greens with rainbow patterns, so I wanted to make a paper pennant banner to hang at the top of my windows (I have a wall of windows).
Hobby Lobby had their scrapbook paper 50% off, and it is only .59 a sheet (for a 12x12), so I purchased 12 sheets for $3.54, so that is how much this entire project cost me. That, some ribbon and thread I already had on hand, and about 30 minutes of my time.
First, select your coordinating papers. Aren't they adorable?

Do you have a paper cutter? You could use your Silhouette or Cricut for this step, but cutting your triangles by hand is so much easier than having to hook up a computer, etc, etc, etc.

Cut out triangles. A bunch of triangles. I cut the 12x12 into four 6x6 (basically cut your paper in half and cut it in half again) and got a triangle out of each 6x6. So essentially, 4 triangles from one sheet of 12x12.


Next, find some coordinating ribbon. I had this white ribbon on hand and thank goodness I had two rolls of it!

Sort your triangles into their respective kinds and create a pattern. I wanted my colors and patterns to alternate, so I did zebra/polka dot/zebra/polka dot pattern as well as green/black/blue/green/black/blue pattern. Am I a Kindergarten teacher or what?

Next, start grabbing one triangle from each pile to create your pattern. Repeat this until you have run out of triangles. Make sure you pick them up in order!

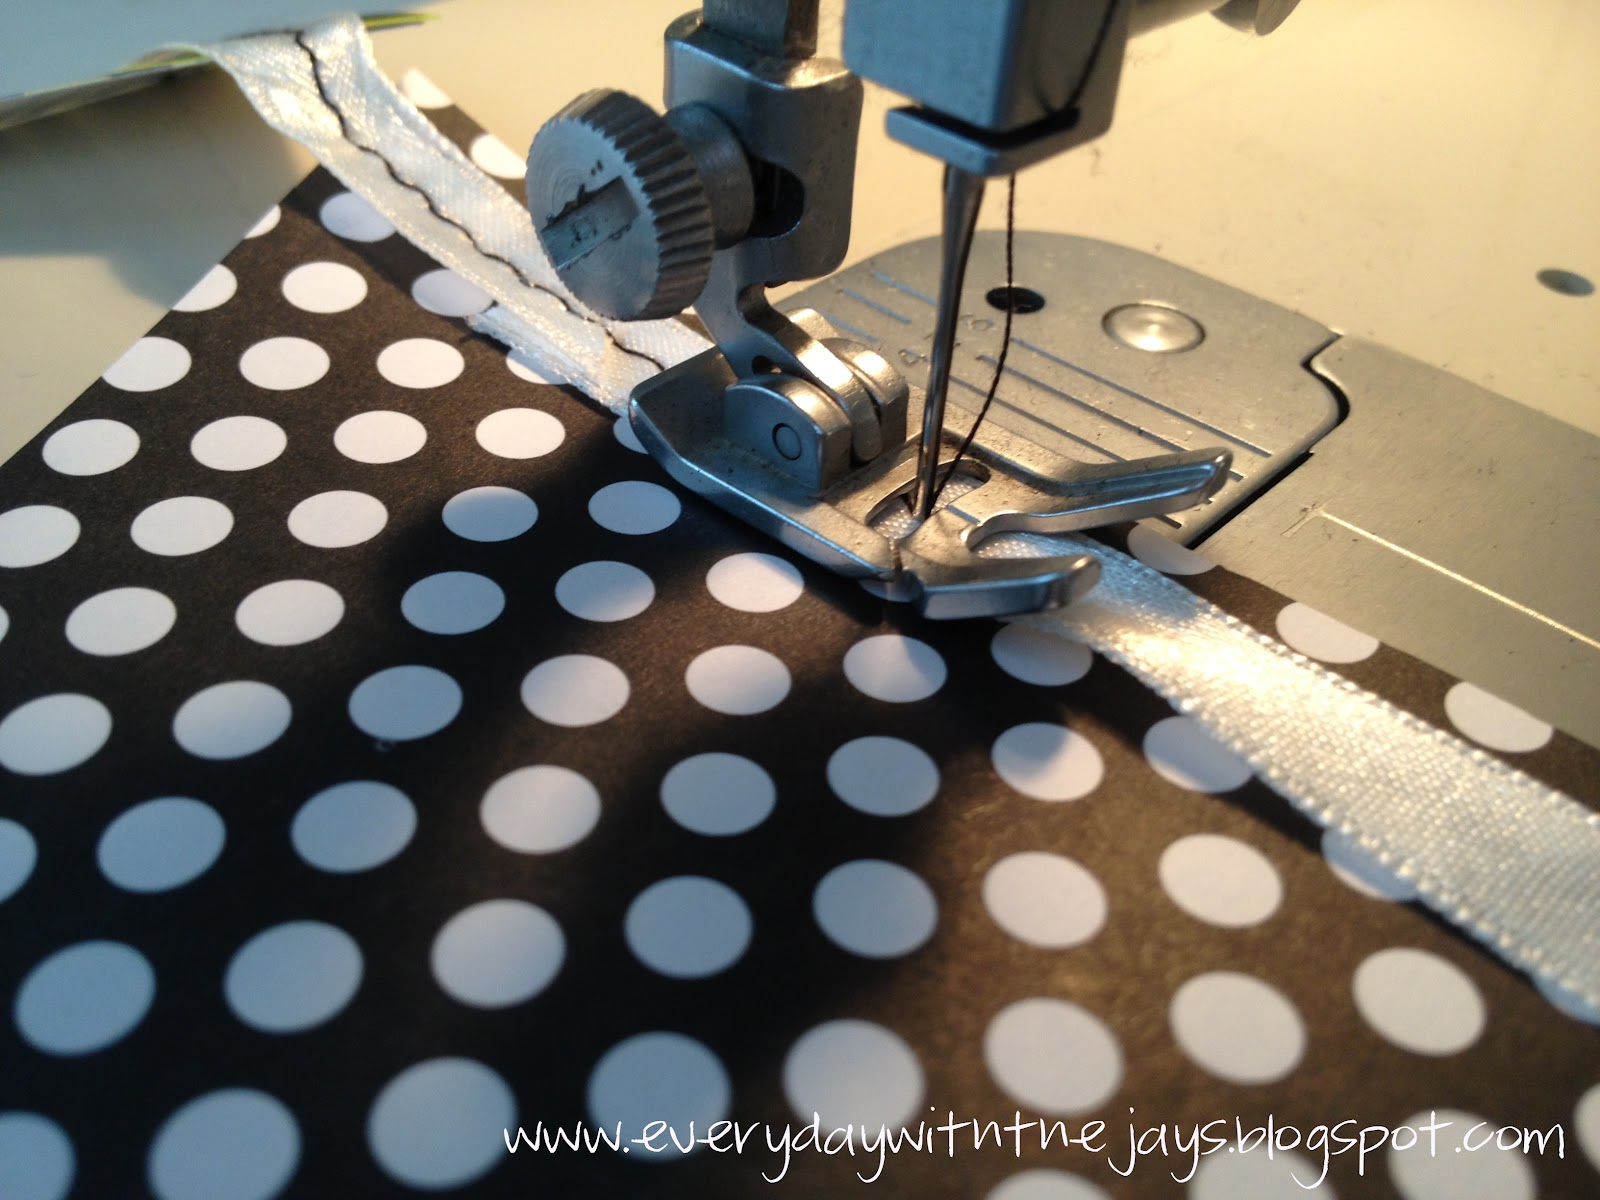
Time to sew. I put my ribbon on the front side of the paper so you could see it and the small zig-zag stitch I was using. You want to make sure your stitch length is wide... too small and it could perforate your paper! Lesson learned from my paper banner during Halloween: I didn't use a ribbon that time, but I really like the ribbon on this one!

Continue sewing... as your triangles come out, be sure to fold them back and forth so they don't rip/fall off the table/get tangled up! Ask me how I know.


Dun dun dun..... My ribbon ran out and I was definitely NOT DONE with the triangles... So here's what I did. Continue sewing....

Sew onto your next piece of paper ALMOST to the end. Key word: almost.

Stick the beginning of your new roll of ribbon UNDER the end of the ribbon already sewn on...

And continue sewing! No one is none the wiser unless they look really close. But don't let them ;)
When you're done, make sure you leave a longer length of ribbon so you can tie it to whatever you're attaching it to (in my case a wall/window).

I tried to string it along to display it all in its beautiful glory... but I was home alone and one set of hands is not enough to handle this jelly. Chloe and Oliver were of no use to me either. (and you can see where I put my wing-back chairs! aren't they cute?)

I had to continue the stringing even to our island... If I had to do math, and I'm ::pretty:: sure this is right, the banner is 24ft long. WHOOAAA.

Fold it accordion style, back and forth/back and forth, so you can store it neatly until you can get into your classroom


So pretty and ready to go!

These banners can be used for anything: classrooms, wedding/baby showers, nurserys, any child's room for that matter, holiday decor. Possibilities. Are. Endless.
Who else sews paper?
See where I link up: Blog Hop @ Naptime Review, Tips & Tricks @ Stringtown Home, What I Whipped Up Wednesday @ Sugar and Dots, Craft-O-Manic Monday @ Craft-O-Manic, Link Party @ Uncommon, Whatever Goes Wednesday @ Someday Crafts, Show Me What Ya Got Linky Party @ Not JUST A Housewife, {Wow Me Wednesday} @ Ginger Snap Crafts, Link Party @ Destination: Craft, The Creative Spark @ Clean & Scentsible, Before & After Party @ Thrifty Decor Chick, Weekend Wrap-Up Party @ Tatertots and Jello, What I Wore Wednesday @ The Pleated Poppy


First, I'm loving your chairs! They look great with those pillows and how they're placed:) I have made paper pennant banner before for our wedding, but I didn't sew them together. I really like the idea of doing this and it gives the banner great detail:)
ReplyDeleteI love your chairs! I've been looking for some as well. You gave me a great idea for a bridal shower I'm planning; I never thought about sewing paper. I'm definitely trying it :)
ReplyDeleteYour wingback chairs look incredible in that space!!
ReplyDeleteAnd you are so crafty! Give me 10% of your talent please.