Showing posts with label Sewing Projects. Show all posts

Monday, January 7, 2013

[make] Island Runner


We finally took down (most of) our Christmas decorations this past week/weekend. The house looks so sad and empty now! But it needed to be done and I am glad it's behind me! Putting it all up is the fun part... taking it down is just the worst. Ugh. But I digress.

Once I removed my Christmas-y centerpiece/decor for our kitchen island, it looked so sad. Empty. Just blah.  It needs to be functional for setting things on during meal time or unloading groceries, but I also want it to be pretty while I'm walking by it the other 90% of the time. (And there is a red stain on it from Christmas... just ignore that. I tried a Magic Eraser... nothing. Any ideas?)

Luckily, I had some extra fabric from our entryway curtains that I had to cut down (they were waaayyyy too long). It was the perfect length for a runner! And it has the same green color that the kitchen backsplash is painted in, so double whammy. Here's what I did:

Cut. Pin. Sew. Iron. Lay out. Decorate with mason jars and tea lights! Easy and simple, yet effective. And it matches the kitchen walls! Win win. Since these photos were taken, I have also added some of our prettier cook books on the right side, along with a jar of cookies. You have to have them easily accessible! And by the way, please ignore my messy kitchen in the background :)

Happy Monday! Four more days until Friday: you can do it!

"Let us fix our eyes on Jesus, the author and perfecter of our faith, who for the joy set before him endured the cross, scorning its shame, and sat down at the right hand of the throne of God." Hebrews 12:2

See where I link up: Monday Made it @ 4th Grade Frolics, Blog Hop @ Naptime Review, Tips & Tricks @ Stringtown Home, What I Whipped Up Wednesday @ Sugar and Dots, Craft-O-Manic Monday @ Craft-O-Manic, Link Party @ Uncommon, Whatever Goes Wednesday @ Someday Crafts, Show Me What Ya Got Linky Party @ Not JUST A Housewife, {Wow Me Wednesday} @ Ginger Snap Crafts, Link Party @ Destination: Craft, The Creative Spark @ Clean & Scentsible, Before & After Party @ Thrifty Decor Chick, Weekend Wrap-Up Party @ Tatertots and Jello, What I Wore Wednesday @ The Pleated Poppy 


Thursday, October 25, 2012

[make] Green Chevron Pillows

You may have seen a sneaky-peek at the fabric I purchased last Friday during my Photo a Day post... Well, here's what I made with the green chevron fabric!

Extra large throw pillows! Basically fold the fabric in a rectangle (wrong sides out), stitch up three and a half sides (leave a space big enough for your hand), flip it right side out, stuff with stuffing, stitch it shut! Easy peasy.

Aren't they beautiful? Chevron is such a fun fabric pattern, the green meshes well with the carpet we have in the dining room as well as the green we painted in the kitchen. Great pop of color!

(the navy and beige pillows are all from Target, of course: the navy pillows are actually outdoor pillows but who says you can't use them inside as well?)

Happy Thursday! We got out of school early this afternoon in order to complete our parent conferences (which they had to schedule with the office: 10 minutes a piece). I always get so nervous! But of course, they went fine as usual! I only had nine conferences and I have one more next week, then I'll be done. I am so blessed to work at a wonderful school where all of the parents are involved and many of the meetings I had were friendly conversations back and forth!

"Train a child in the way he should go, and when he is old he will not turn from it." Proverbs 22:6


Friday, September 28, 2012

[favorites] Young House Love

For this week's Four Favorites for Friday, I turned to the first blog I ever read, Young House Love, to find four of their projects that I can't wait to tackle someday. If you have never read their blog, I strongly urge you to go there now! You will be there for hours. They are two average peeps who love to do DIY to their home and share it with the world on their blog. Projects from painting, building, decorating, sewing, crafting, and anything/everything in between. Here's four of their projects I can't wait to start:
All photos from www.younghouselove.com: specific links listed below.

[one] turning an old door into a desk: Nate and I pulled the door off of our "toilet room" (an itty bitty room/closet in our master bath for the toilet: seriously, if you had shut the door, it would've felt like a coffin in there) as soon as we moved in. I have the perfect spot in a hallway that leads to our bedroom to turn this door into a long, fabulous desk!

[two] sewing a baby quilt: Not that I'm pregnant or anything, but Sherry made sewing this striped quilt look so incredibly easy! It is adorable and if you use special meaning fabric, it will make it that much more special.

[three] recovering a lamp shade: We have some u-g-l-y standard lamp covers in our house that I would really like to update with fabric that matches our decor. Tools? Fabric and a glue gun. Yes please.

[four] lining dresser drawers with scrapbook paper: How fun is this little surprise in your dresser drawers?! Using scrapbook paper (which costs like .50) and Mod Podge to update a dresser in a fun and modern way is such a great idea. We have a dresser in our bedroom that could definitely use some sprucing up!

Click on the link provided to visit the specific post where John and Sherry do some fabulous DIY-ing!

Happy weekend! Nate and I are in Dallas currently visiting the State Fair of Texas (it's a big deal) and attending a Texas Rangers game (also a big deal)! Expect posts accordingly next week!


Create in me a pure heart, O God, and renew a steadfast spirit within me.
Psalm 51:10


Wednesday, September 12, 2012

[make] Felt Flower Pillow

We have this u-g-l-y Ikea couch we inherited from my brother when he moved to South Korea. It's not that it's "ugly" but it's definitely more apartment/college dorm room friendly and not fit for our living room. However, we are still using it until we purchase another couch or love seat.

To spice up the couch, I wanted to make some new pillows! I had this fantastic black and white striped fabric. Simply sew most of the edges, leaving a bit of space to turn it right side out and then stuff the pillow. Stitch up that side closed and you have a pillow! I used mustard yellow felt to add some felt flowers to give some pizazz and cuteness.

I used this: one large felt circle, obviously not cut perfectly. About 8 medium sized circles and 5 small circles...

 To make this! Just use hot glue. A crafter's girl's best friend! I made two and had more photos to share but apparently I'm out of "room" on my photo storage... so as soon as I hook up Nate's external hardrive and transfer some things, I'll be back in business!


 Simple. Cute. Easy!

Happy Wednesday! So excited to head to the in-laws this weekend. Nate's brother and sister-in-law just had a baby last Friday, a  s-w-e-e-t baby girl named Clara! Expect pictures and/or cute baby things.

See where I link up: Monday Made it @ 4th Grade Frolics, Blog Hop @ Naptime Review, Tips & Tricks @ Stringtown Home, What I Whipped Up Wednesday @ Sugar and Dots, Craft-O-Manic Monday @ Craft-O-Manic, Link Party @ Uncommon, Whatever Goes Wednesday @ Someday Crafts, Show Me What Ya Got Linky Party @ Not JUST A Housewife, {Wow Me Wednesday} @ Ginger Snap Crafts, Link Party @ Destination: Craft, The Creative Spark @ Clean & Scentsible, Before & After Party @ Thrifty Decor Chick, Weekend Wrap-Up Party @ Tatertots and Jello, What I Wore Wednesday @ The Pleated Poppy 


Monday, August 20, 2012

[make] Knotty Blanket

Don't get any ideas, you guys :)

I needed a soft blanket to add to a "We Care" bucket in my classroom (basically a bucket for a kiddo to grab something out of when they are feeling sad and need something cuddly to help them feel better). Of course no-body has those cheapy $5 fleece blankets they have everywhere during Christmas-time. Then it hit me. Duh. Make my own. Here's what I did:

Gather supplies (two colors of fleece- tan and mustard yellow for me), coordinating fabric (leopard print of course), rotary cutter, scissors, not pictured: sewing machine and coordinating thread

Cut your two fleece fabrics the same size. I just wanted a small blanket (kind of like what Linus carries around in Charlie Brown cartoons) so I cut the two pieces into a rectangle shape.

I wanted to add a heart with my coordinating fabric since this blanket was going in my "We Care" center... just to show some love when they are feeling sad. To make a perfect heart, fold your fabric in half and cut out half of a heart. Unfold and voila!


Next, decide where you want your heart to lay on your fleece fabric (just pick one of your fleece pieces). If I were to do this again, I would've pinned it further away from the edges, but oh well. Live and learn!

Stitch that heart on there yo.

Pretty zig-zag stitches.

Next, put your two fleece pieces on top of each other and go around the perimeter of your blanket to cut little slits, about 1 inch wide. All the way around....

To where it looks like this:

Then plop yourself in front of the TV (yep, that's the Olympics... I did this a while ago...) and start tying knots!

If a little girl sits in your lap and cuddles with its sweet softness, don't push her away (or turn the lights on apparently).

The end! See how the heart is so close to the edge? Meh. Next time :) But the knots secure the fleece pieces together without you having to sew all the way around and then having to turn it inside out and then having to stitch it closed... Whew.

Hahahaha. I can't make this stuff up. Okay, she did sit on it and I told her to lay down so I could get an adorable picture. Mission accomplished. I believe she feels cared for.

Have you ever made one of these blankets? I made one in high school with my aunt (blue/white background with footballs all over it... took it to games when I cheered and marched in the band)... Oh the glory days.

Happy Monday! I survived our first full day of school yesterday. How many more to go? ;)

See where I link up: Monday Made it @ 4th Grade Frolics, Blog Hop @ Naptime Review, Tips & Tricks @ Stringtown Home, What I Whipped Up Wednesday @ Sugar and Dots, Craft-O-Manic Monday @ Craft-O-Manic, Link Party @ Uncommon, Whatever Goes Wednesday @ Someday Crafts, Show Me What Ya Got Linky Party @ Not JUST A Housewife, {Wow Me Wednesday} @ Ginger Snap Crafts, Link Party @ Destination: Craft, The Creative Spark @ Clean & Scentsible, Before & After Party @ Thrifty Decor Chick, Weekend Wrap-Up Party @ Tatertots and Jello, What I Wore Wednesday @ The Pleated Poppy 

"Ruin my life, the plans I have made. Ruin desires for my own selfish gain. Destroy the idols that have taken Your place, til its You alone I live for... You alone I live for." -Jeff Johnson


Sunday, August 5, 2012

[photoaday] Week Thirty One

Well since this was a crazy-busy week full of classroom prep and VBS organizing, I hardly had time to take a photo each day! You'll be able to tell where I cheated (i.e. random pictures of my dogs) and where I consolidated one picture for two days... Yeah. I've enjoyed being lazy this weekend!

Everyday with the Jays

[sunday july 29/monday july 30]: Matching VBS shirts for our Sky theme! They say "Flight Crew" on them and have the scripture verse on the back ("Everything is possible with God!")

[tuesday july 31]: I crashed every night after VBS! The schedule was VBS, dinner, Olympics, bed. Repeat.

[wednesday august 1]: Y'all. Is this not the CUTEST classroom decor ever?! All animal print and bold colors! Gotta have an engaging atmosphere for these kiddos! The banner will be strewn across the windows (hopefully), the blue/green fabric is for my personal bulletin board and the birthday bulletin board, the black and white leopard spots is for their pictures/Jesus bulletin board, the brown/black leopard spots is for our 100's chart bulletin board, and the regular leopard print at the bottom of the stack is for some classroom curtains and for the bulletin boards in the hallway. Fun stuff!

[thursday august 2]: The curtains I was talking about. These hide my teacher clutter on the shelves! Lifesavers.

[friday august 3]: Oliver lounging in our dirty house... as in towels thrown on the floor vs. hung up. We have been l-a-z-y.

[saturday august 4]: Sneak peek at my August wreath! The theme: pinwheels! And the inspiration came from VBS. Go figure!

It was a great week but a BUSY one and it's only going to get busier! I HAVE TO FINISH SETTING UP MY CLASSROOM THIS WEEK so I can focus on lesson planning and making copies/gathering supplies/cutting construction paper/organizing and labeling . It's a goal of mine. Let's do this!

Happy Sunday! Tell God thank you for what He has blessed you with: home? job security? loved ones? a meal? a bed? a shower? Any and everything, all praise and honor goes to Him! 


Wednesday, July 18, 2012

Make: DIY Camera Strap

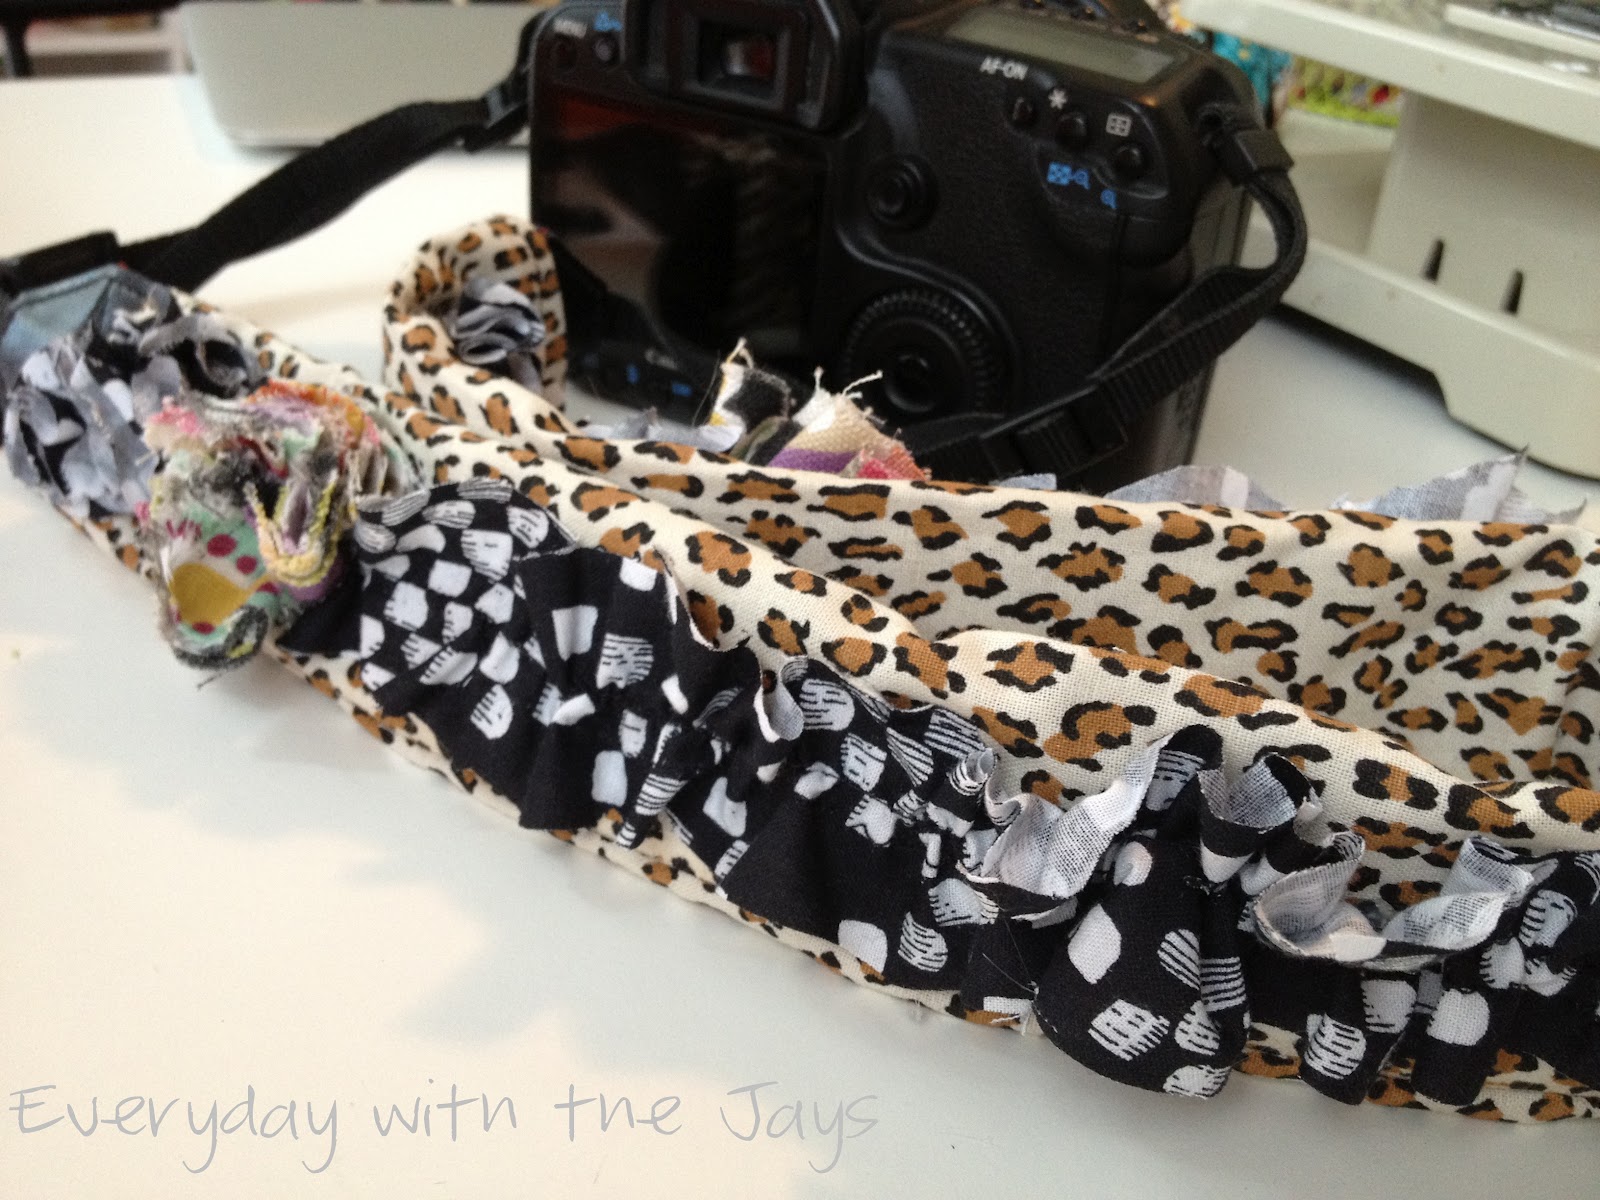
We are having an amazing time in Kansas this week! However, today I am here to talk business with you. Camera strap business. I was ready to get my ugly, factory standard Canon strap outta here! I found this amazingly simple tutorial at Mom 4 Real through a blog link party! That's why we share ladies, sharing is caring :) I won't give the tutorial, head to Jessica's blog to get the instructions!

I used my skirt fabric for the ruffle... Her tutorial says to make a 5" width on your ruffle but that was h-u-g-e and I had to trim it multiple times for it to look right on the strap. Unless I just misread the instructions, which is very likely!

And leopard print fabric for the strap...

You HOT GLUE (amazing) the ruffle to the strap...

Ick. Ugly Canon strap.

I used some of my April wreath rosettes (and I made a few extra with the black fabric) to attach to the strap for added flair (with hot glue again)...
 

Pull your adorbs strap over your ugly strap...


Pretty! Ready to take pictures in style.


I put it on and I had an appropriate t-shirt on... the arrow is pointing to the strap! Ha!

Instagraaammm (chrissydj)

Who else has a camera strap? I've seen some cute ones on Etsy but I am cheap like to make my own things, so voila! Happy Wednesday!